


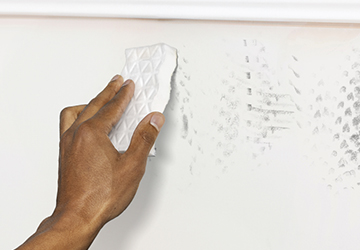
Walls need maintenance more often than you think. It can easily collect fingerprints, shoe marks, pencil lines, and everyday scuffs quickly. It becomes more challenging if you have small children. There is a product that can help – wall erasers.
The wall eraser makes it look fresher again without repainting everything. Pick the right one and use it properly with this guide. This way, you can lift many of those stubborn smudges. It’s easier to keep the wall surface looking well-maintained.
Wall Eraser – What Can it Really Do?
A wall eraser works by lifting stains from the outer layer using gentle abrasion. It’s often handy for a variety of issues – crayon marks, pencil lines, fingerprints, and minor scuffs. And compared with most liquid cleaners, wall erasers can be used with little or no extra cleaner. They can work on their own. They’re also compact and easy to store.
Check the Wall Type First
Before you start using a new product, think about what kind of wall you’re dealing with. Different wall materials respond uniquely to cleaning products. Some are not responding well to abrasive cleaning products. So, it’s smart to follow the manufacturer’s recommendations. Test the eraser on a small spot that’s out of view before you go cleaning a larger visible section.
Start With Light Pressure
One of the main tips when using a wall eraser is not to push too hard. Many wall erasers do the job with light pressure, so heavy scrubbing is often unnecessary. Start by gently rubbing the marked area, and then give more pressure slowly only if the mark refuses to budge. Keeping your motion controlled can lift the stain easily. At the same time, you reduce the risk of damaging the wall finish.
Remove Marks As Soon As Possible
Do not wait for the marks to stay long on your walls. Fresh marks are usually easier to deal with than stains that’ve been sitting on a wall for a long while. When you see a scuff, handle it right away. Having a wall eraser somewhere easy to grab can make those quick fixes more convenient.
Avoid Over-Scrubbing The Walls
Even though a wall eraser can remove tough marks, constantly rubbing the same patch may change how that paint looks. If a mark doesn’t come off after gentle cleaning, inspect if you made any progress at all. Do not keep applying steady pressure. Certain spots might call for a different approach.
Keep Your Eraser Clean
If your eraser is dirty, it can smear leftover residue instead of lifting it away. For a reusable wall eraser, follow the manufacturer’s instructions for cleaning and storage. If you’re using disposable ones, replace them once they get really dirty. Clean tools work better. This makes wall touch-ups feel less challenging.
Extra Care With Delicate Finishes
Not every wall should be rubbed with an abrasive eraser. Delicate wallpaper, specialty paint textures, and surfaces with decorative coatings can be more sensitive to these products. If you’re not sure what the wall is made of, try the eraser in a less visible spot first. Also, it’s safer to follow the cleaning directions on the label. You do not want to make it worse than you intend to.
Conclusion
Wall erasers can be handy for handling wall smudges. You don’t have to resort to complicated cleaning solutions. The trick is picking the right product to use. With regular touch-ups and simple cleaning routines, you can keep up and make the most-used spots stay looking cleaner for longer. A basic wall eraser can turn into a practical part of your household cleaning routine.