
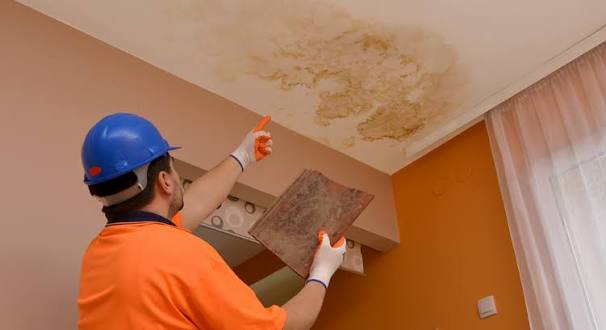

There’s nothing quite like looking up at your ceiling and spotting a mysterious brown patch that definitely wasn’t there before. It’s the sort of discovery that can make any homeowner feel a little uneasy, particularly when there’s no obvious explanation for it. While a water stain might seem like a simple cosmetic problem, it often points to moisture getting somewhere it shouldn’t. The good news is that, once you’ve identified the cause, you can take the right steps to deal with it properly.
Find Out Where the Water Is Coming From
Before reaching for a paintbrush, it’s important to work out what’s causing the stain. Water can travel along beams and other structural materials, so the source of the leak isn’t necessarily directly above the affected area.
If there’s a bathroom upstairs, a leaking pipe, faulty shower seal, or overflowing fixture could be responsible. Roof damage is another possibility, particularly if the stain becomes more noticeable after heavy rain. Condensation can also cause discoloration, especially in rooms with poor ventilation.
If the problem appears to be coming from your plumbing, experienced plumbers Thousand Oaks residents trust can help track down the source of the leak and recommend the best way to fix it. Getting to the root of the problem now could save you from dealing with another water stain further down the line.
Check How Much Damage Has Been Done
Once the leak has been addressed, take a closer look at the affected ceiling. A small, dry stain may only require cosmetic repairs, but bubbling paint, peeling plaster, or sagging drywall suggests that moisture has caused more substantial damage. Be particularly cautious if the ceiling feels soft or appears to be bulging. Waterlogged materials can become unstable, so avoid touching or standing beneath visibly sagging sections until they’ve been professionally assessed. Water near electrical fixtures also needs urgent attention from a qualified professional.
Let the Ceiling Dry Completely
It’s tempting to cover an unsightly stain as quickly as possible, especially when it’s in a room you use every day. However, painting over damp material is unlikely to end well. Moisture trapped beneath the surface can encourage mold growth and cause fresh paint to peel or blister.
Depending on the extent of the damage, drying may take several days or longer. Good ventilation and a dehumidifier can help, although extensive water damage may require specialist drying equipment. Make sure the affected materials are thoroughly dry before attempting any decorative repairs.
Prepare the Surface Before Painting
Once everything is dry and sound, you can turn your attention to the stain itself. Gently clean the surface to remove any dirt or residue, taking care not to soak the ceiling again. Next, apply a suitable stain-blocking primer. This is an important step because ordinary ceiling paint may not prevent brown water marks from showing through. After the primer has dried according to the manufacturer’s instructions, repaint the area, blending the finish with the surrounding ceiling.
Don’t Ignore the Warning Signs
A water stain is rarely something that should be dismissed as an ordinary decorating issue. Even a relatively small mark can indicate a leak that’s been developing quietly for some time. Taking the time to investigate the cause, repair any damage, and restore the ceiling properly will give you a much better result than simply covering the mark. More importantly, you’ll have the reassurance of knowing the underlying problem has been dealt with, rather than waiting for that unwelcome brown patch to make another appearance.